Friday, 6 November 2020

Sticky Note Wall Bop

Age Range: 5-11


Equipment needed: 26 Sticky notes, pen or pencil, soft ball and a door or wall to stick your sticky notes on

Sticky Note Wall Bop
 

On this post, I will explain how to play sticky note wall bop which is a fun game and can help with your creativeness, problem solving, throwing accuracy and spelling.


For this game, you will need 26 sticky notes, pen or pencil, a soft ball and a door or wall to stick your sticky notes on. 


To get started, you are going to write all the letters of the alphabet on your sticky notes and stick them to your wall or door. Ensure there is enough space in between each letter as well as having different letters placed with each other to make the game harder. 


Once your ready to play.....

        Pick a word to spell out. With this word, you are aiming to spell it by throwing your ball at the individual sticky note one letter at a time.

So take a few steps back from your wall/door and see how you get on!


How to progress....

  • Take further steps back from the wall/door to test your throwing accuracy
  • Spell bigger and complex words
  • If you were to incorrectly throw at one letter or miss the letter, then you would have to spell the word again
  • Eliminate the consonants and keep the vowels game -  In this game, you create a word from the letters you have. For example with the word 'DANNY', you would spell the word and remove the D, N and Y from the game as these are consonants. With the remaining letters, you make a word until there are no consonants left and all 5 vowels remaining. This progression helps with creativeness and problem solving where by you thinking of a word with the letters you have left.


Watch the Sticky Note Wall Bop game video:
 
 
Thank you and hope you enjoyed the blog post. Please leave in the comments how you found playing this game as well as different progressions you could play and be sure to check out some of my other blog posts.😊

Friday, 30 October 2020

Dancing Ghost Experiment

  Age Range: 4-11    

 Equipment needed: Tissue, scissors, tape, balloon

Adult supervision may be required to blow up and tie the balloon


Dancing Ghost Experiment

 If you love Halloween, well get excited, because I've made a fun Halloween science experiment for you guys to try. On this post, I'll be showing you how to make the dancing ghost experiment. This experiment is simple, but very effective.    

This is also a good challenge of making your own ghost dance by using nothing but a bit of static electricity. 

To make your dancing ghost, you will need all the items from the image below as well as using either your hair or a rug to rub your balloon on.

To do the dancing ghost experiment:

Start with your tissue

 Draw a ghost on to your tissue. Add a face as well to your ghost if you like. Feel free to experiment with larger and smaller sizes of your ghost.

  Cut your ghost out from your tissue
 
Tape the very tip of the bottom of your ghost to your table/surface
 
Rub your balloon on your hair or rug to give it a static charge
 
Hold your balloon over your ghost to make it dance and there you have it..........
Your own dancing ghost
 
 
The science behind this:                                                                                  When you rub the balloon through your hair or rug, invisible electrons build up on the surface of the balloon. The electrons have the power to pull up very light objects towards them and in this case, the ghost tissue!


Thank you and hope you enjoyed the blog post. Please leave in the comments how you found doing the dancing ghost experiment and be sure to check out some of my other blog posts on Danny's Blog. Have a wonderful Halloween!!😊👻

Tuesday, 27 October 2020

Ghost Pretzels

 Age Range: 5-11

Equipment needed: White chocolate chips, mini pretzels, candy eyeballs, fork and spoon

Ghost Pretzels

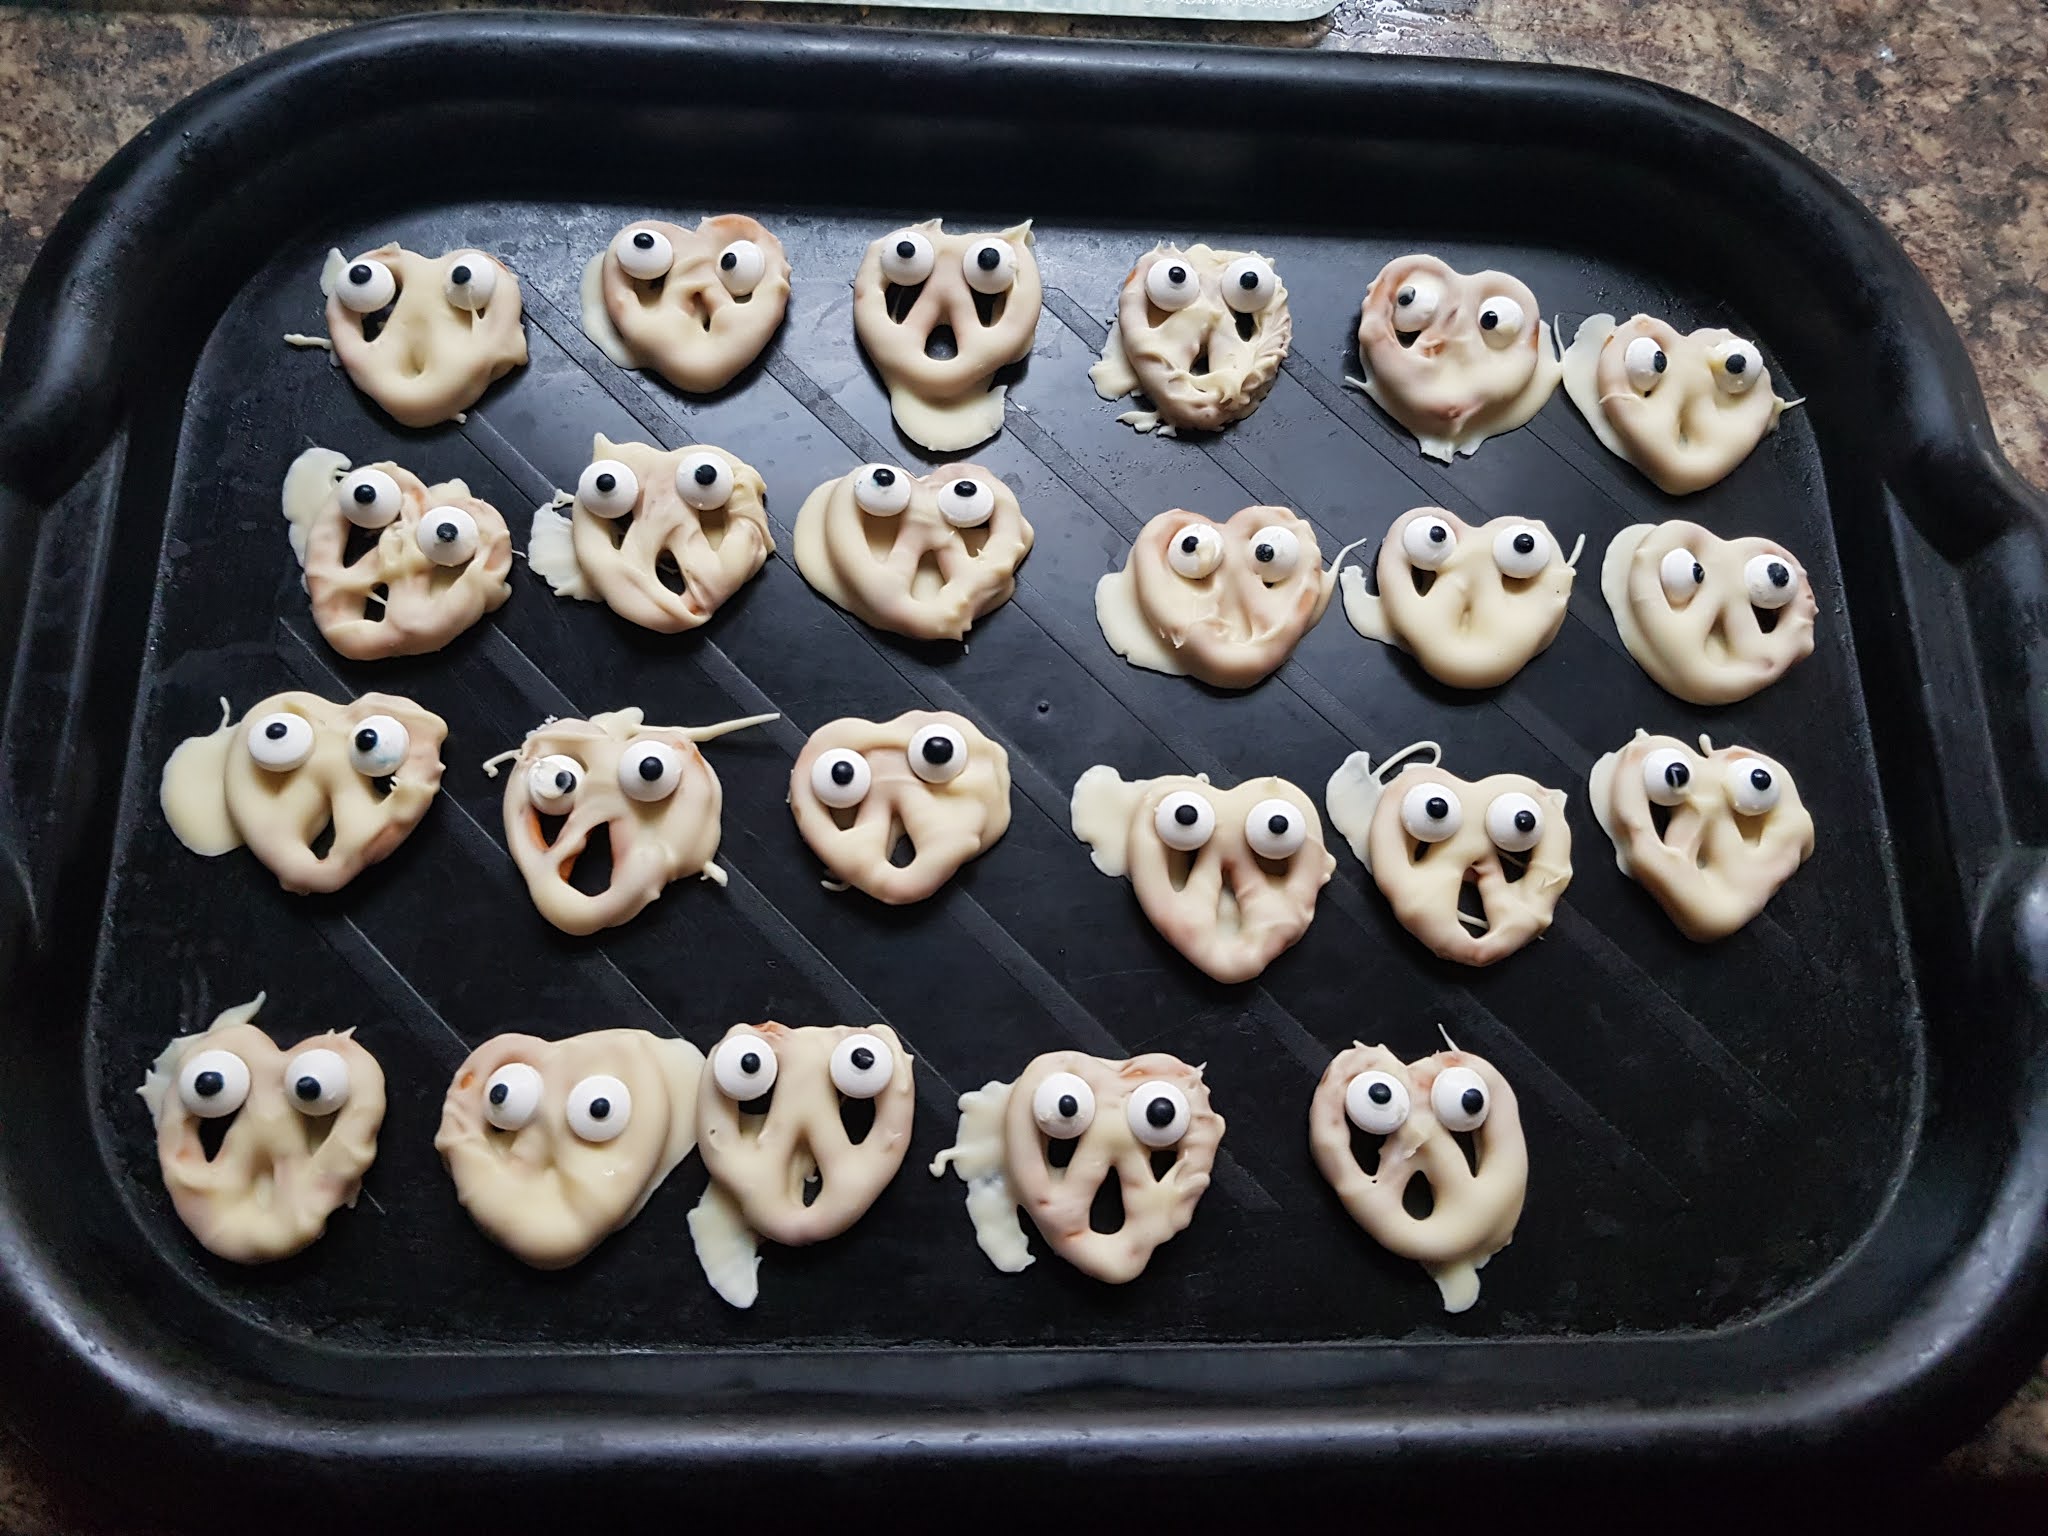
  If you love Halloween, well get excited, because I've made a fun Halloween treat for you guys to try. These ghost pretzels are a huge hit and they are so flipping easy to make! 
They require only a handful of ingredients as shown by the image below.
 
 
To make your ghost pretzels: 

Line a baking tray with baking paper or parchment paper and then set aside 

Melt the white chocolate in a glass bowl in the microwave, for short 10-20 second bursts mixing, until melted.

 
Immediately dip pretzels, one at a time, into the bowl 
  
Shake off the excess chocolate from the pretzel with the fork. If you like, you could shake the chocolate out of the bottom hole, so it looks like an open mouth -- screaming.
 

Place chocolate dipped pretzels on the prepared baking sheet 

Immediately press two eyeballs into the top two holes for eyes -- add a little extra chocolate if needed. 
 
 
Repeat with remaining pretzels. Work quickly and re-heat the chocolate again only once, if needed.
 
Allow pretzels to rest and harden. You could either place them in the fridge for 1 hour or place them in the freezer for 10 minutes to speed up the process.  
 
Peel pretzels off the baking sheet and enjoy your ghost pretzels!
 
Thank you and hope you enjoyed the blog post. Please leave in the comments how you found making your own ghost pretzels and be sure to check out some of my other blog posts on Danny's Blog. Have a wonderful Halloween!!😊👻