Friday, 15 January 2021

Domino Rally

 Age Range: 3-11   

Equipment needed: Dominoes and Household items

 
Domino Rally

On this post, I will be showing how to create your own domino rally. A domino rally is a chain reaction which can be caused by a set of tumbling dominoes. 
This is great for indoor and outdoor play and can also help with construction play, teamwork and problem solving. 


How to create your domino rally                                                                                       Place your dominoes one behind the other with a 3cm gap in between each of them. It's important you have a 3cm gap in between them so that there is enough space and that the dominoes will fall onto the corresponding domino and thus keeping the rally going.


Domino Rally 1

For the first domino rally, just like the image below, you could set up a simple rally where the dominoes are in a straight line one behind the other and have them fall onto each other. You could even add a target at the end of this rally for example a ball aiming to land into a cup from the result of the rally.


Domino Rally 2

To progress the domino rally, you could change the pattern of the rally by creating a curved domino rally where the dominoes will curve onto one another like the image below.


Household Domino Rally

To progress the domino rally and make the activity more interesting, you could even create your own rally by using household items. When using household items, items used must topple over and they can't be too big. It's entirely up to you what items you use and the best part is..... you made it yourself.


 Watch the video to see how to play domino rally:


 Thank you and hope you enjoyed the blog post. Please leave in the comments how you found creating your own domino rallies and be sure to check out some of my other blog posts on Danny's Blog.😊

Friday, 8 January 2021

Crab Palm Art

 Age Range: 4-11

Equipment needed: A4 sheet paper, black and red felt tip pen
Crab Palm Art
 
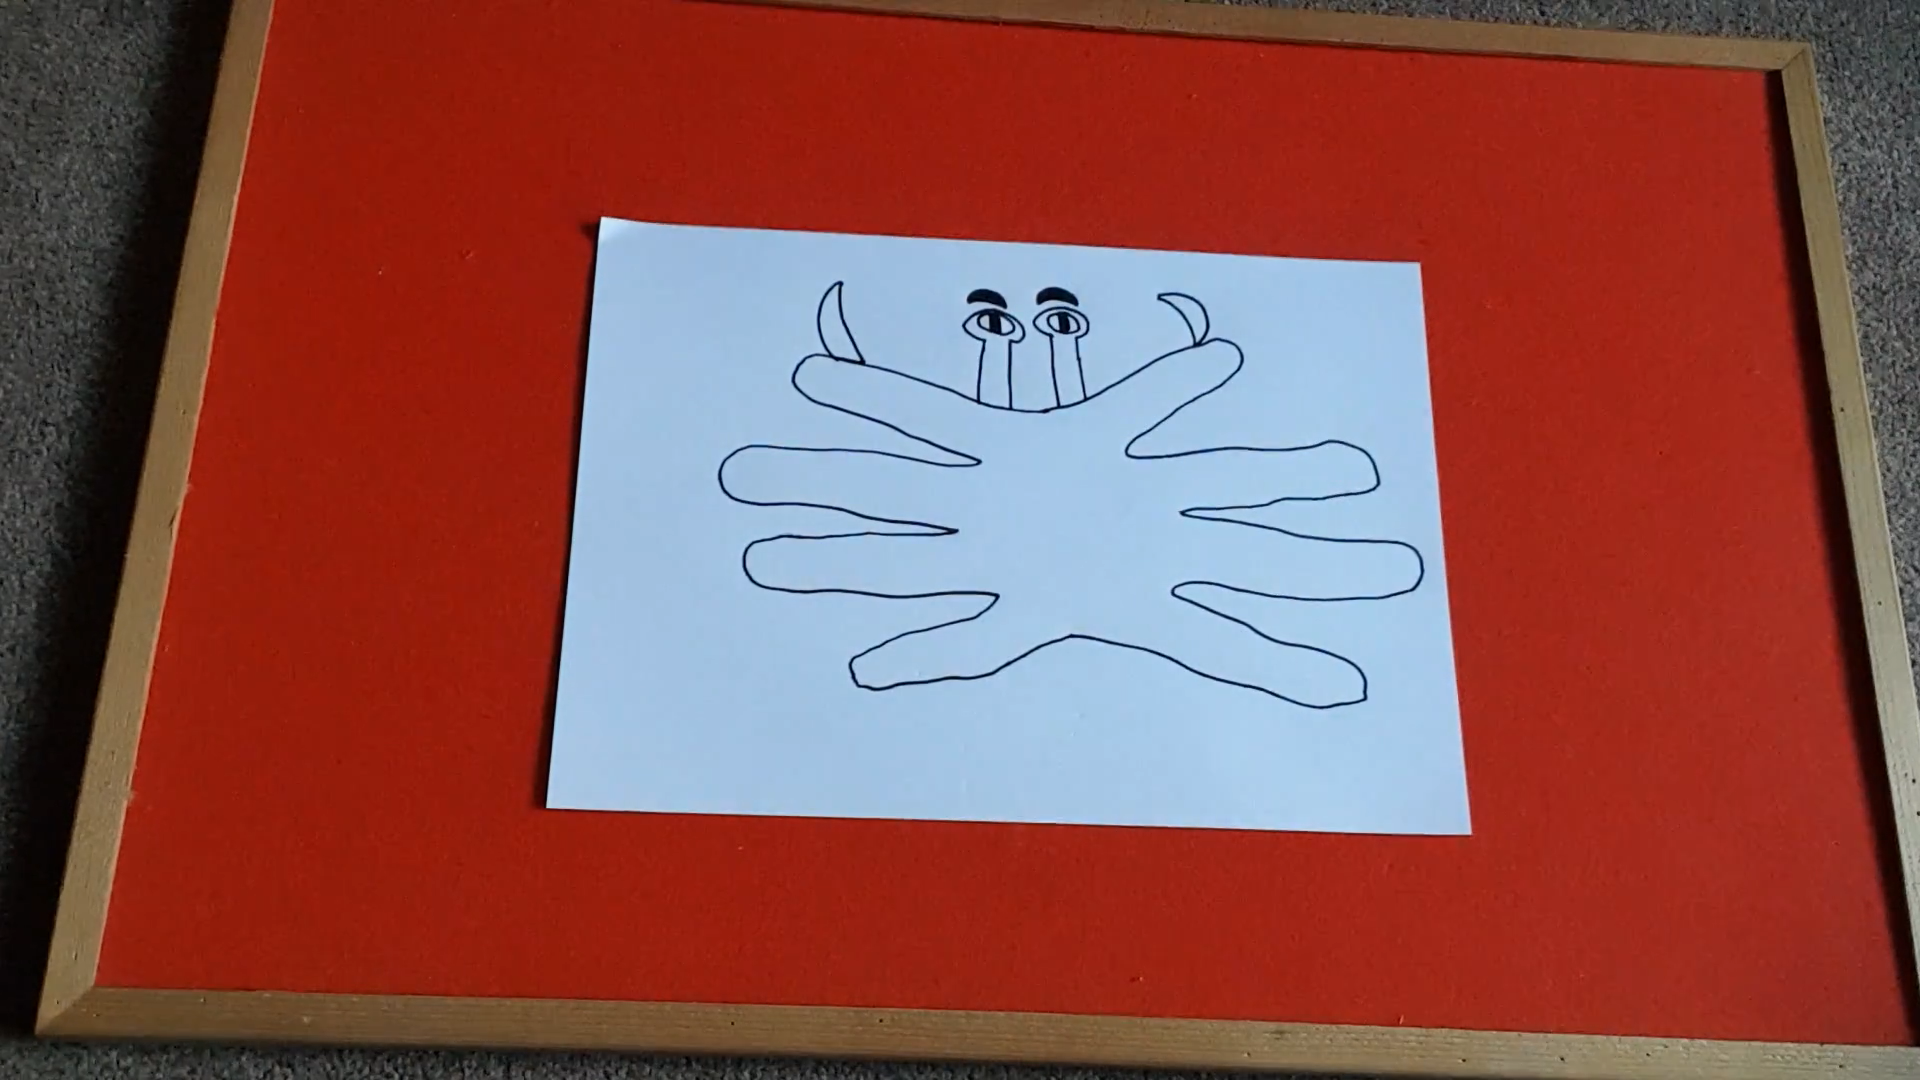
Have you ever wanted to learn how to draw a crab? Well you can do this, simply by using the palm of your hand. ✋🦀
 
To draw your crab: 
 
 Start by drawing your 4 fingers from your left hand on a sheet of A4 paper with your paper in portrait view
 
Turn your paper round so that your fingers are facing the opposite way
 
Draw your 4 fingers again of your left hand on top of your original finger drawing
 
Turn your paper round to landscape view
 
Draw two crescent moon shapes on top of your fingers
 
Draw two round antennas similar to the image below on your crab
 
In your antennas, draw one circle in each of them and colour in the middle section of your circles with a black pen
 
Draw two eyebrows on top of your eyes and colour in with a black pen
 
For the mouth, draw a straight line and then draw a mouth underneath it
 
Colour around your eyes, the antennas and the crescent moon shapes in red pen
 
Colour in the rest of the crab with a red pen except for the mouth to make your own crab palm art
  
Watch the Crab Palm Art video:
 

Thank you and hope you enjoyed the blog post. Please leave in the comments how you found drawing your own horse as well as any feedback you may have. Please also leave in the comments any animals you'd like me to draw for you guys and be sure to check out some of my other blog posts on Danny's Blog.😊🦀

Friday, 1 January 2021

Rainbow Skittles

Age Range: 4-11

Equipment needed:Pack of skittles, Hot water, White plate


Adult supervision required 


Rainbow Skittles

On this post, I will be showing how to make an awesome skittles rainbow effect. You can also alternatively watch the video at the bottom of the page to see how to do this activity. This is a great DIY skittles experiment that parents can do with their kids and is a very colourful science project that is great to watch! You can make a tons of designs and a bunch of colourful combinations.

To make your rainbow skittles, you'll need:

• White Plate 

White plate brings a good background when making the rainbow and you can clearly see the colours joining together.

• A pack of Skittles or M&Ms

• Jug of Hot Water

Hot water works best instead of cold water as the sugar in the skittles dissolves more quickly in the hot water rather than in cold water. This is due to their being more molecules in hot water which helps dissolve the skittles more quickly and the colours to come out very quickly as well.

To get hot water, open your hot water tap for 5 seconds and after that time, pour the hot water into a jug. A kettle won't be needed as you won't need boiling water. To check if you have hot water, hold your hand over the jug of hot water and if you can feel the heat radiate onto your hand, you have hot water. However, if you do the same method and you cannot feel any heat radiate on to your hand, then most likely you will have have cold or room temperature water.


To make rainbow skittles:

Open up your skittles and place them on your plate  


Arrange your skittles all around the edge

Pour just enough hot water to cover the plate and look what happens

  
And there you have it, your own skittles rainbow effect

  
Here’s some other patterns you can try with your skittles
 
Watch the video to see how to make your own rainbow skittles:
 
 
Thanks guys and hope you enjoyed the post today. Be sure to leave a comment on how you found making your own rainbow skittles as well as any other patterns you have made and be sure to check out some of my other blog posts. 😊