Friday 11 June 2021

Dog Palm Art

 Age Range: 4-11

Equipment needed: A4 sheet paper, black and pink felt tip pen

Dog Palm Art
 
Have you ever wanted to learn how to draw a dog? Well you can do this, simply by using the palm of your hand. ✋🐶
 
To draw your dog:
 
Place your left hand on a sheet of paper with your thumb facing out. Have your index finger and middle finger facing towards the top right corner of your paper similar to the image below. Your remaining fingers will be placed into your hand.
                                          
Draw round your hand
 
 From your hand drawing, draw a large round semi circle and ensure it links to the bottom of your hand drawing similar to the image below
 
Draw a round circle in the left hand side of your hand drawing
 
For the eye, draw a circle and then a line drawn half way through it
 
On the right hand side of the circle, draw a very small circle and then colour in the remainder of the right hand side circle with a black pen

Add a line on top of your eye for the eyebrow and a small line with a point to where your thumb was drawn similar to the image below

 On your thumb part, draw a wide U-shape with a line in it for the mouth

 Draw a nose on the bigger finger you have drawn. Do this by, drawing a curve lined similar to the image below and a small section at the top of the nose

 Colour in the nose with a black pen making sure you don't colour in the small section at the top of the nose
 
Draw three lines on either side close to your nose for the whiskers and add some small dots in between them

 Colour the ear and mouth with a pink pen

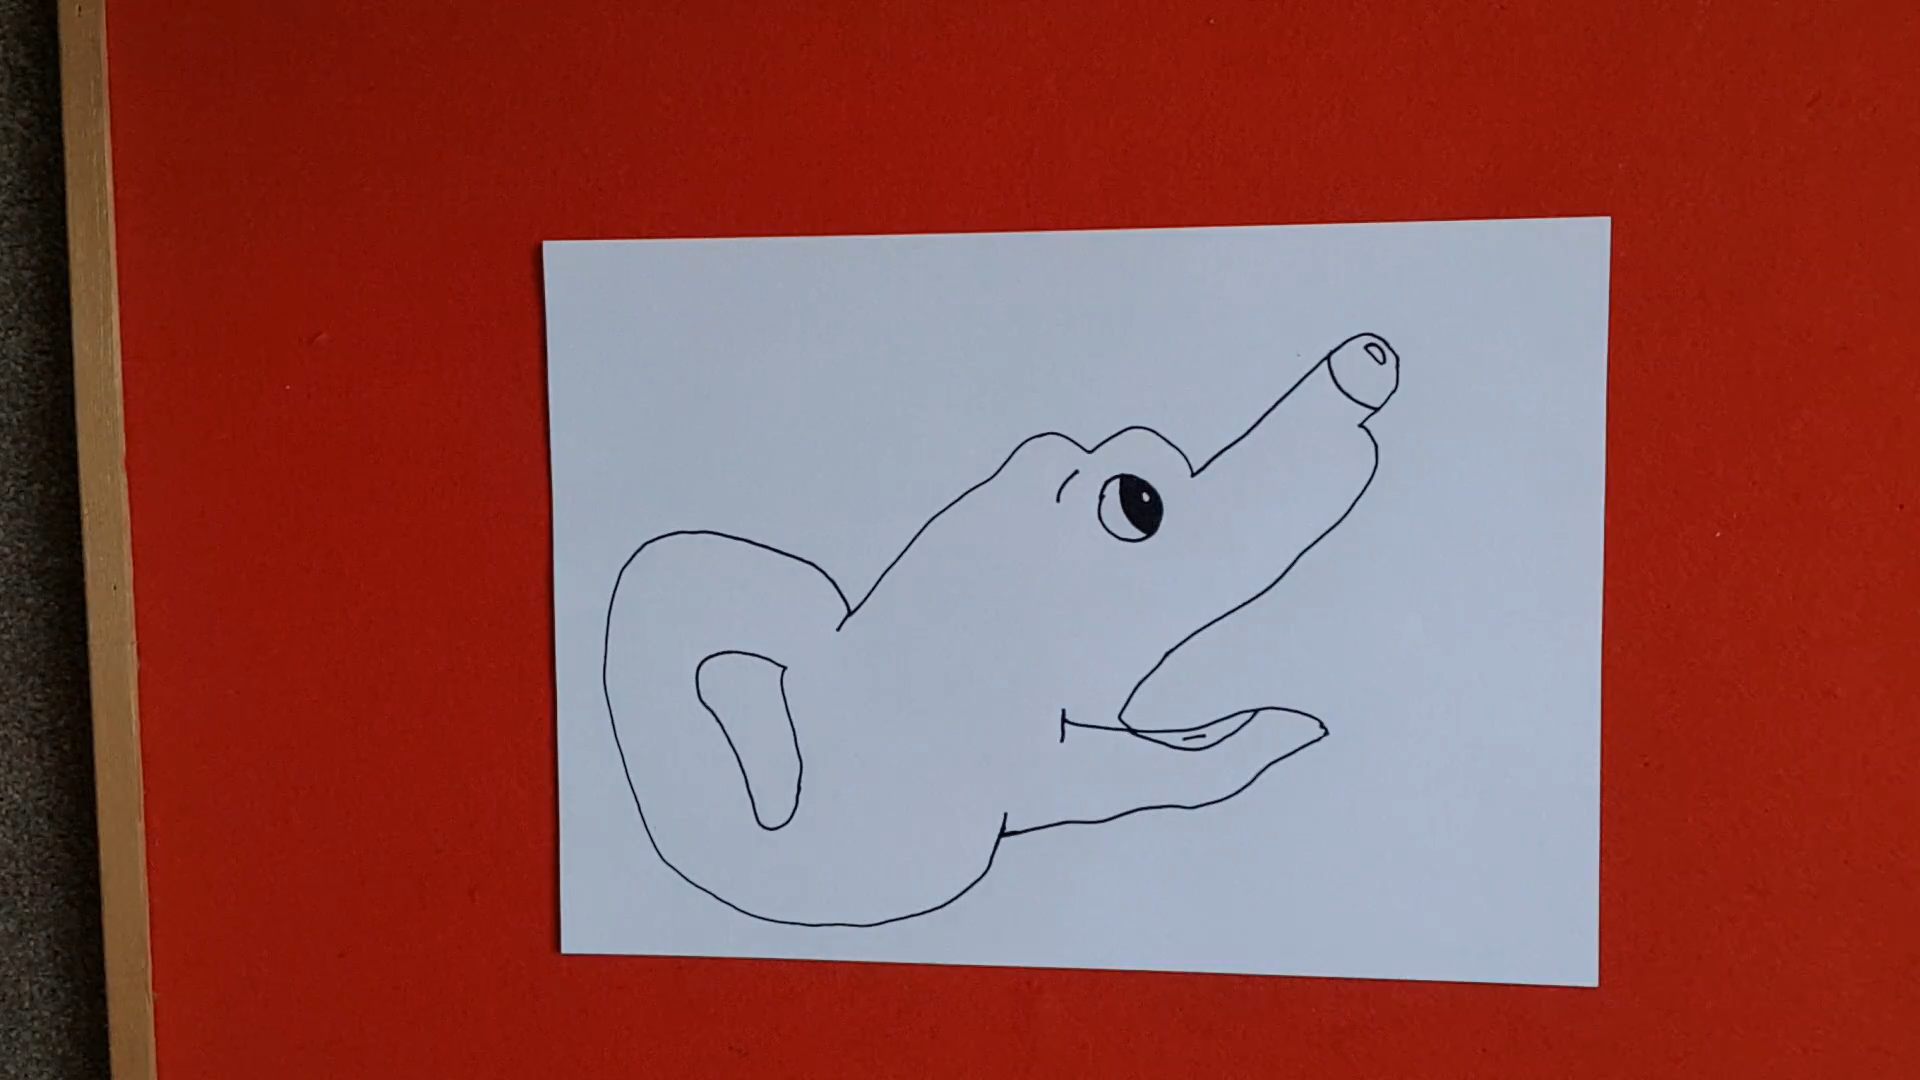
 You have made your own dog palm art

Watch the Dog Palm Art video: 
 
 
Thank you and hope you enjoyed the blog post. Please leave in the comments how you found drawing your own dog as well as any feedback you may have. Please also leave in the comments any animals you'd like me to draw for you guys and be sure to check out some of my other blog posts on Danny's Blog.😊🐶

Friday 4 June 2021

Light Refraction Science Experiment

  Age Range: 4-11

 Equipment needed: Glass, water, black pen and paper

Light Refraction Science Experiment
 
On this blog post, I'll be showing you a science magic trick by doing the light refraction science experiment. The results of this experiment are always very surprising. Children and adults will be amazed as to what causes the arrow in this experiment to change direction right before your very eyes.

To do the light refraction science experiment:

 Draw one arrow at the top of your paper
 
Draw another arrow at the bottom of your paper making sure both arrows point in the same direction
 
 Colour your arrows in with a black pen
 
Fill your glass with water
 
Slowly lower the piece of paper behind the glass of water
 
Look through the glass of water and see what happens.
You'll see the arrow at the bottom has now completely changed direction

The science behind this:    

This experiment is caused by a science topic called refraction. Refraction is the bending of light and occurs when light travels from one place to another. This can be air to water or water to air.

In the experiment, light traveled from the image through the air and then through the glass into the water and finally out of the glass and into the air once again before it reaches our eyes. Light refracts from one place to another because it travels at different speeds through those places. Light travels faster through air, a little slower through water and even slower through glass.

This shows that the light bends once when it travels through the glass into the water and bends again when it travels out of the glass and into the air. This is why the light paths crossed and the arrow appeared to change direction when you see it.

Watch the video to see how to do the light refraction science experiment:


Thanks guys and hope you enjoyed the post today. Be sure to leave a comment on how you found doing the light refraction science experiment and be sure to check out some of my other blog posts.😀