Friday, 2 April 2021

Cinnamon sugar Easter bunny twists

Age Range: 6-11

Ingredients: 2 sheets puff pastry sheets, 2 tablespoons melted butter, 1 tablespoon cinnamon, 2 tablespoons sugar, white frosting (Optional)

Adult Supervision Required

  
Cinnamon Sugar Easter Bunny Twists

For Easter, I'm going to be showing you a fun Easter treat to make which requires only 5 ingredients as seen by the image below. On this blog post, I'll show you step by step on how to make your own cinnamon sugar bunny twists. These bunnies are very sweet because of the cinnamon sugar and the puff pastry bakes up nice and flaky.

To make your own cinnamon sugar bunny twists:

Pre-heat your oven to 400F/200C/ Gas Mark 6
 
  
Place your butter in a glass bowl and melt the butter in the microwave for 30 seconds

Unroll both your pastry sheets
 
Brush over one of your pastry sheets with butter, making sure you leave about 1/2 inch down each side without butter.
 
Brush over your second pastry sheet with butter and also ensure you leave about 1/2 inch down each side without butter.
 
Combine the sugar and cinnamon into a bowl just like the image below

Pour over the cinnamon mixture over the butter on one of the pastry sheets ensuring you leave the 1/2 inch on each side

Brush water along the 1/2 inch down each side

Place your second pastry sheet on top of your first pastry sheet which has the cinnamon onto it. When doing this, make sure you place the buttery side of the pastry sheet down onto your cinnamon.

Use a fork to crimp the edges where you brushed water and then press the top sheet of pastry down gently so the cinnamon sugar has a chance to be absorbed a bit by the butter

Using a pizza cutter or knife, slice the pastry in half, from one crimped side to the other. Slice the top and bottom section in half, repeating until you have 16 narrow strips going from side to side.

Take each strip and twist it twice to make a shape like you see below, with an open circle at the bottom and the two crimped ends pointing up. Make sure when you do this that the strip is on it’s side, so you can see the cinnamon sugar between the two layers of pastry.

Bake in the preheated oven for 10-12 minutes or until the pastry is golden brown

 You have made your own cinnamon sugar Easter bunny twists

OPTIONAL: To add some frosting tails, allow to cool from oven for about 20 minutes. After the 20 minutes, add the white frosting by piping or spreading onto the center of your bunny for the tails. 
 
Thank you and hope you enjoyed the blog post. Please leave in the comments how you found making your own cinnamon sugar bunny twists and be sure to check out some of my other blog posts on Danny's Blog. Have a wonderful Easter!!😊

Monday, 22 March 2021

Paper Handprint Bunnies Craft

 Age Range: 5-11     

Equipment needed: 1 sheet A4 paper(any colour), scissors, pencil, black felt tip pen or crayon and pink felt tip pen or crayon

Paper Handprint Bunnies


 If you love Easter, well get excited, because I've got a fun and simple Easter craft for you guys to try. On this blog post, I'll be showing you how to make your own paper handprint bunnies and the best part is you probably have everything you need at home to make these. They suit children of all ages and is sure to make you smile when they're finished. You can make any faces and your favourite emojis drawn onto your bunny. 

 To make your own paper handprint bunnies:

Start by placing your right hand onto your piece of paper

With your left hand, trace round your hand

Draw a line to curve round your hand

Cut out your handprint

Cut off the middle finger so you're left with two finger bunny ears

Next, fold down the baby finger towards the center to make one of your bunny ears

Then fold down the thumb towards the center for the other bunny arm

Draw the pink parts of the ears and colour them in

Draw an oval for the rabbit's nose

Using a black pen, draw the rest of the face including the eyes, whiskers, mouth and teeth

Finally, draw two little paws at the bottom of the handprint to make the bunny's feet
 
You have made your own paper handprint bunny

Here are some other examples of different paper handprint bunnies you could make

Watch the paper handprint bunnies craft video:


Thank you and hope you enjoyed the blog post. Please leave in the comments how you found making your own paper handprint bunnies as well as any feedback you may have with this post and be sure to check out some of my other blog posts on Danny's Blog. Hope you have a wonderful Easter!! 😊

Friday, 19 March 2021

Bird Palm Art

  Age Range: 4-11

Equipment needed: A4 sheet paper, black, yellow and purple felt tip pen

  Bird Palm Art

 Have you ever wanted to learn how to draw a bird? Well you can do this, simply by using the palm of your hand. ✋🐦

To draw your bird:

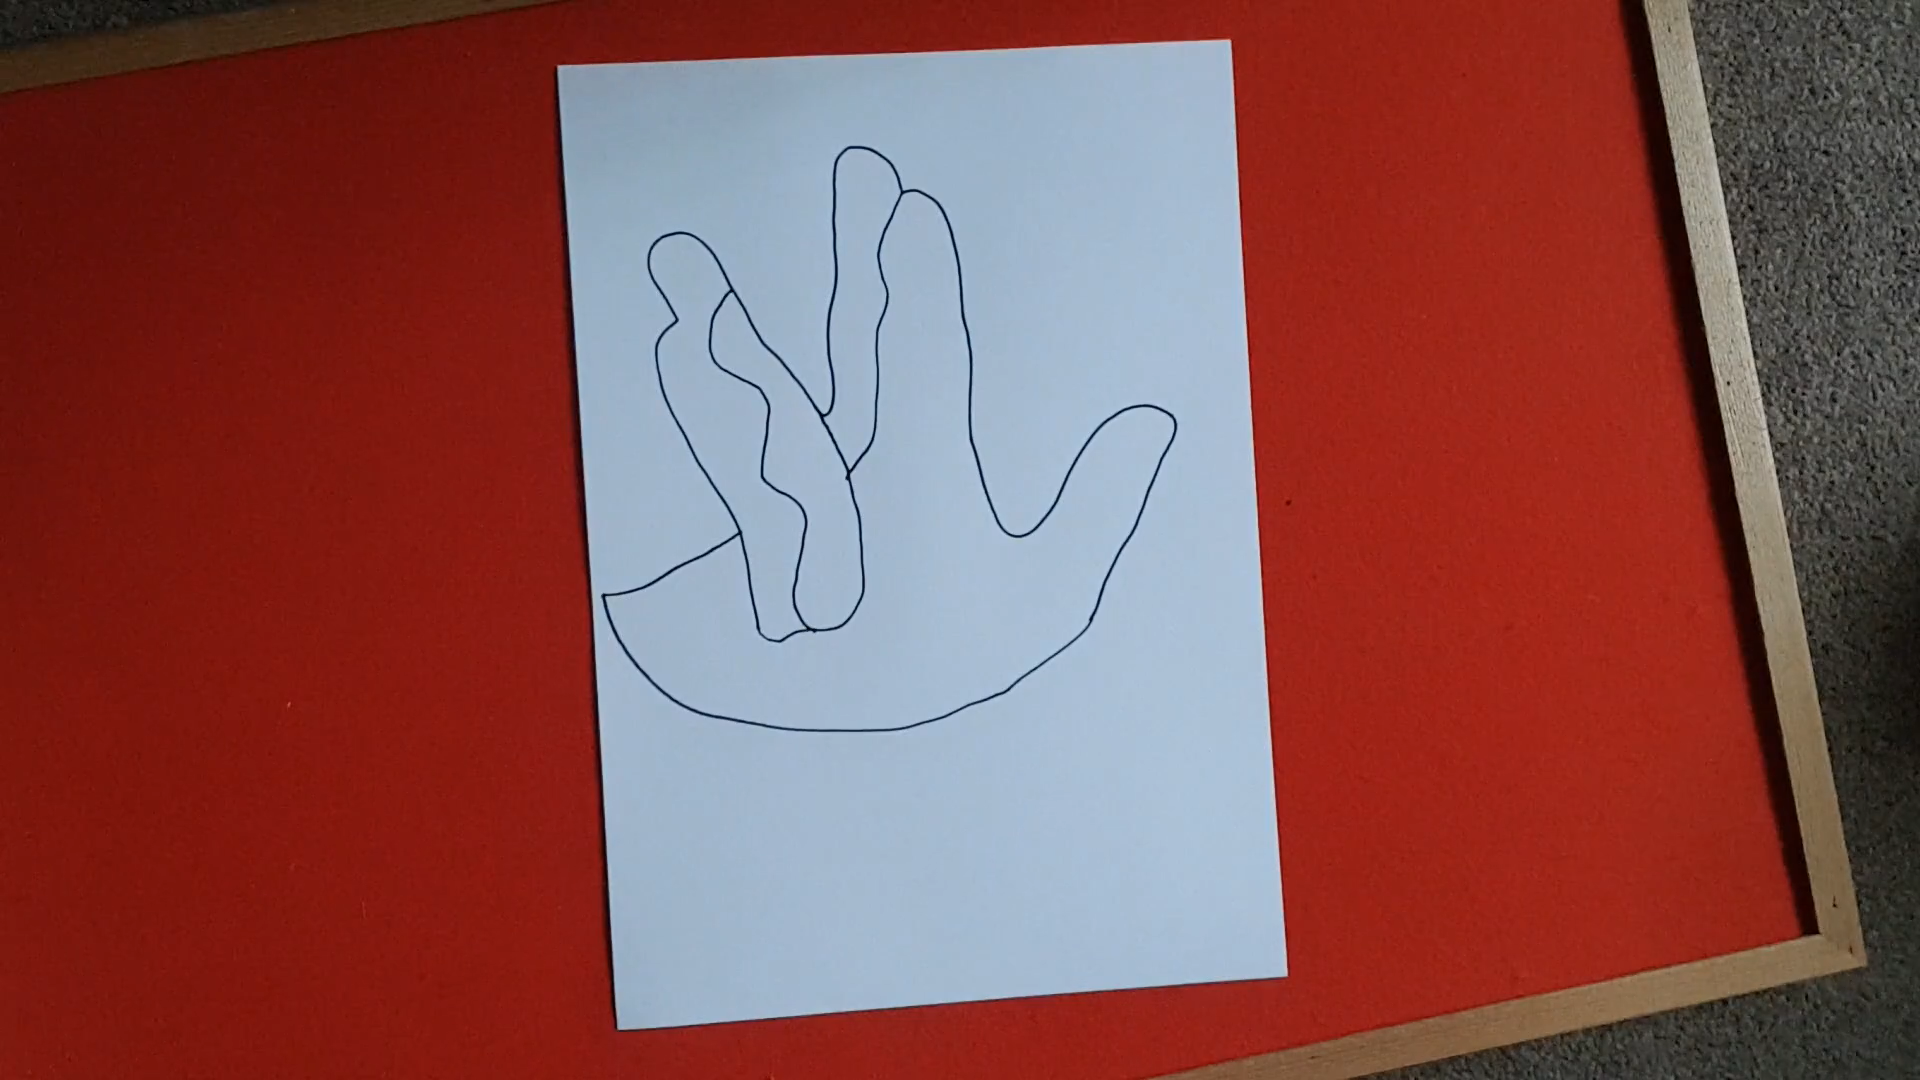
 Place your left hand on a sheet of A4 paper with your paper in portrait view. Have your little finger and ring finger close to each other and leave a V-gap for your middle finger and forefinger. Leave your thumb placed out.
 
Draw round your hand

From the thumb, draw round towards the end of the page and then draw a straight line towards your original hand drawing.
 
Draw two squiggly lines similar to the image below to join your fingers together
 
Draw two small double curved lines which resemble the letter 'S' close together on where the thumb has been drawn for the bird's necklace. Add a small circle towards the tip of your thumb for the eye as well.

 In the circle for your eye, draw a small circle at the top of it and colour it in with a black pen
 
Add a triangle next to the eye for the beak and a small line heading down for the tail of your bird.

 For the bird's feet, draw two lines with then another three more lines coming off each of the feet you have drawn similar to the image below

 Colour the beak, necklace and tail with a yellow pen

 Colour two parts of your finger drawing with a purple pen similar to the image below
 
You have drawn your own bird palm art

 Watch the Bird Palm Art video:

Thank you and hope you enjoyed the blog post. Please leave in the comments how you found drawing your own bird as well as any feedback you may have. Please also leave in the comments any animals you'd like me to draw for you guys and be sure to check out some of my other blog posts on Danny's Blog.😊🐦