A blog full of fun children's games, drawing ideas, cooking recipes and a whole adventure of fun! New posts will be updated on this blog every Fridays so hope you all enjoy!
Friday, 21 May 2021
Keeping Paper Dry Underwater Experiment
Age Range: 5-11
Equipment: Paper towel, empty glass and a bucket or tub of water
Keeping Paper Dry Underwater Experiment
On this blog post, I'll be showing you a science trick by showing you how to keep a paper towel dry whilst underwater. You may think this is impossible but actually it is very possible and it takes a little science fun to make it happen!!
For this experiment, you'll need the following from the image below:
To do this experiment:
Tear off a piece of paper towel
Place your paper towel in to the bottom of your empty glass. Make sure the paper towel is at the bottom of your glass and is completely pushed down inside the glass
Turn the glass over and make sure the paper towel is held at the top.
No part of the paper should be above the rim of the glass.
If the paper towel does slip down, push it back up inside the glass
Submerge the glass under the water with your paper towel inside it
Make sure the glass is completely under the water
Lift the glass out of the water
Pull the paper towel out of the glass
You will find the paper towel to be completely dry and that is how you keep paper dry underwater
The science behind this:
You will not be able to see it but air is made up of matter. Due to the air being made of matter, it now has mass and volume. The volume takes up space and so this experiment shows the air's volume.
When the glass is placed in the water, air is trapped inside of the glass because of the water pushing up from below. Air is less dense than water and so is able to stay on top of the water. The paper towel will not get wet as long as the air stays in the glass. Even slightly if you tip the glass, this experiment may not work as the air will get trapped and thus the paper towel getting wet due to the water rushing in.
Thanks
guys and hope you enjoyed the post today. Be sure to leave a comment on
how you found doing the keeping paper dry underwater experiment and be sure to check out some of my other blog
posts.😀
Friday, 14 May 2021
Sheep Palm Art
Age Range: 4-11
Equipment needed: A4 sheet paper and black felt tip pen
Sheep Palm Art
Have you ever wanted to learn how to draw a sheep? Well you can do so, simply by using the palm of your hand. ✋🐑
To draw your sheep:
Place your left hand on your piece of paper with your first set of finger bones spaced out on your paper and your thumb tucked into your hand
Draw round your hand
Turn your piece of paper round so that your finger drawing is now at the bottom of your page
Place your left hand again on the piece of paper but this time on the top of your finger drawing. Make sure your fingers are again spaced out but have your thumb facing outwards like the image below
Draw round your hand
Draw a line heading down and then curve it back with another line heading downwards for the face of the sheep similar to the image below. Add two circles for the eyes as well
In the two eyes, you have drawn, add a small black circle in both of them and then a small crescent shape underneath for the mouth
On the top of the face, draw a small bubble for the sheep's head
Go round the outline of the sheep's body with a black pen whilst also adding a small oval for the tail as seen by the image below
Draw two sets of straight lines close together like the image below at the bottom of your sheep's body for the feet/hoofs
OPTIONAL: Just below the mouth of your sheep, add the word 'baaaaah' which would typically be the sound of what a sheep makes
You have made your own sheep palm art
Watch the Sheep Palm Art video:
Thank you and hope you enjoyed the blog post. Please leave in the comments how you found drawing your own sheep as well as any feedback you may have. Please also leave in the comments any animals you'd like me to draw for you guys and be sure to check out some of my other blog posts on Danny's Blog.😊🐑
Friday, 7 May 2021
Breadstick Wands
Age Range: 6-11
Ingredients: 100g Milk Chocolate or chocolate chips, 60g sprinkles, breadsticks and chocolate stars(optional)
Adult Supervision Required
Breadstick Wands
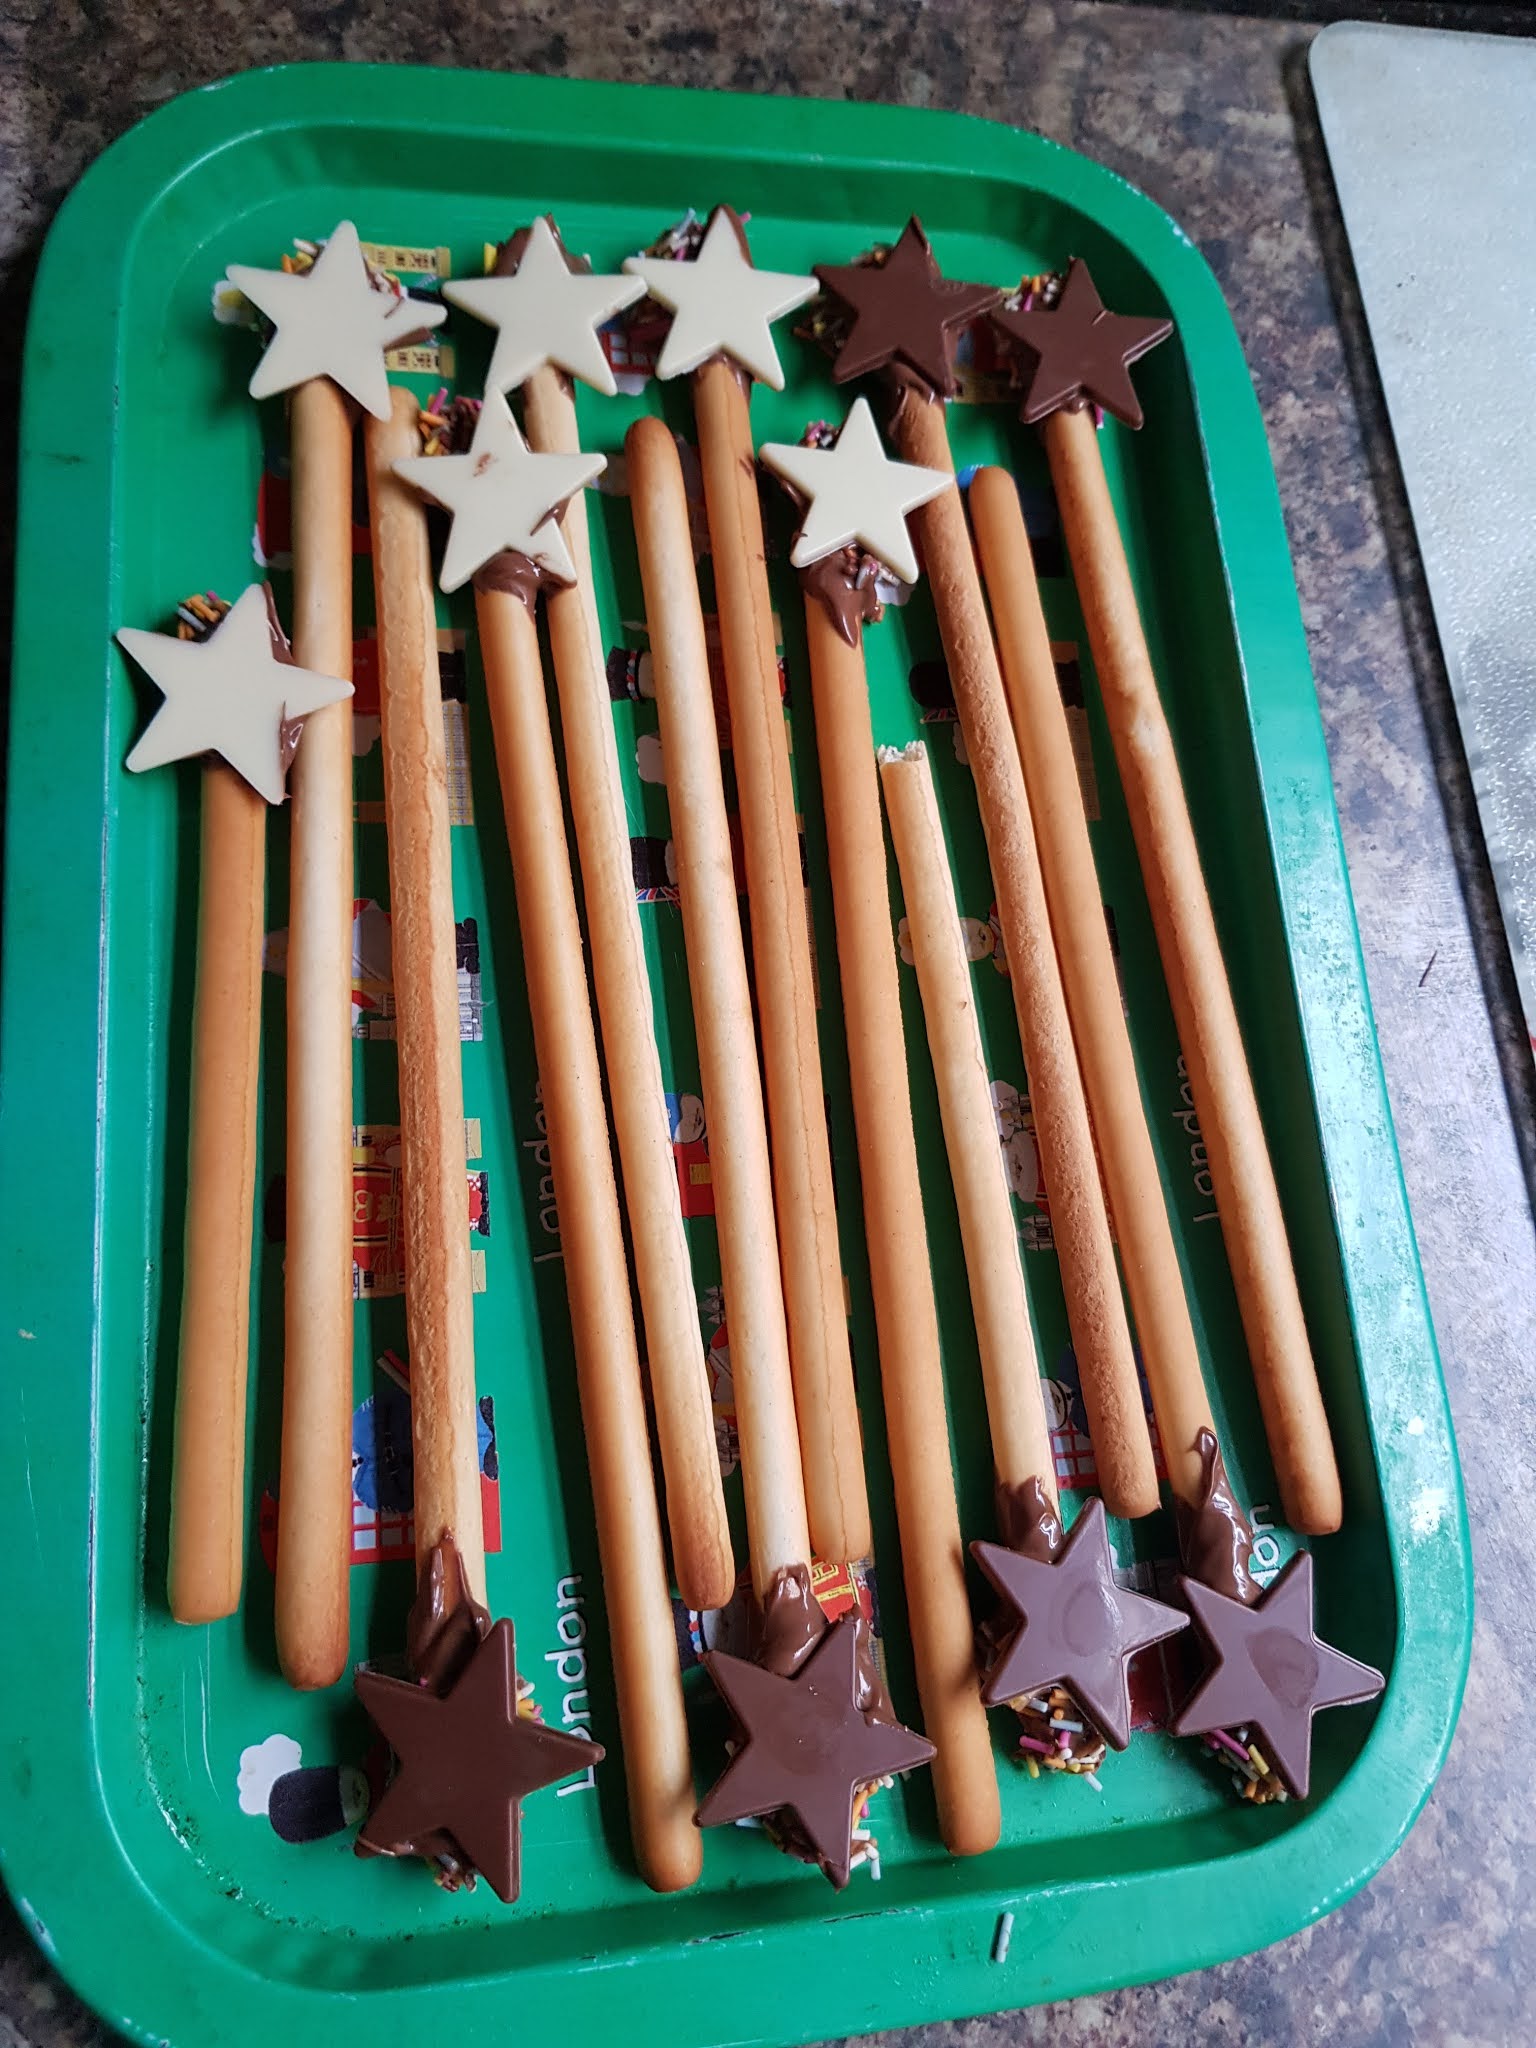
On this blog post, I'm going to be showing you how to make your own breadstick wands. This is a fun recipe to make with your kids and is also great for kid's birthday parties and can even be used as fireworks for bonfire nights as well. These breadstick wands are a great recipe for not only spending time in the kitchen but how much fun your kids will have with these wands
To make your wands, you will need the following from the image below
To make your own breadstick wands:
Place your chocolate/chips into a bowl
Melt the chocolate in the microwave and cook for 30 seconds and then stir the chocolate. Keep microwaving for 20 more seconds at a
time until it is completely runny. Put the sprinkles in a bowl and put that bowl next to the chocolate
Dip the top of the breadstick in the melted chocolate
Dip your breadstick now in the sprinkles
If you have the larger chocolate stars, put a little melted chocolate on the back of each star
Stick your stars onto the top of your wands where your sprinkles are
Complete the same process for the rest of your breadsticks
Leave it to set by placing them in the fridge for around 10 mins so that the chocolate hardens quickly
Subscribe to:
Posts (Atom)