Friday, 19 March 2021

Bird Palm Art

  Age Range: 4-11

Equipment needed: A4 sheet paper, black, yellow and purple felt tip pen

  Bird Palm Art

 Have you ever wanted to learn how to draw a bird? Well you can do this, simply by using the palm of your hand. ✋🐦

To draw your bird:

 Place your left hand on a sheet of A4 paper with your paper in portrait view. Have your little finger and ring finger close to each other and leave a V-gap for your middle finger and forefinger. Leave your thumb placed out.
 
Draw round your hand

From the thumb, draw round towards the end of the page and then draw a straight line towards your original hand drawing.
 
Draw two squiggly lines similar to the image below to join your fingers together
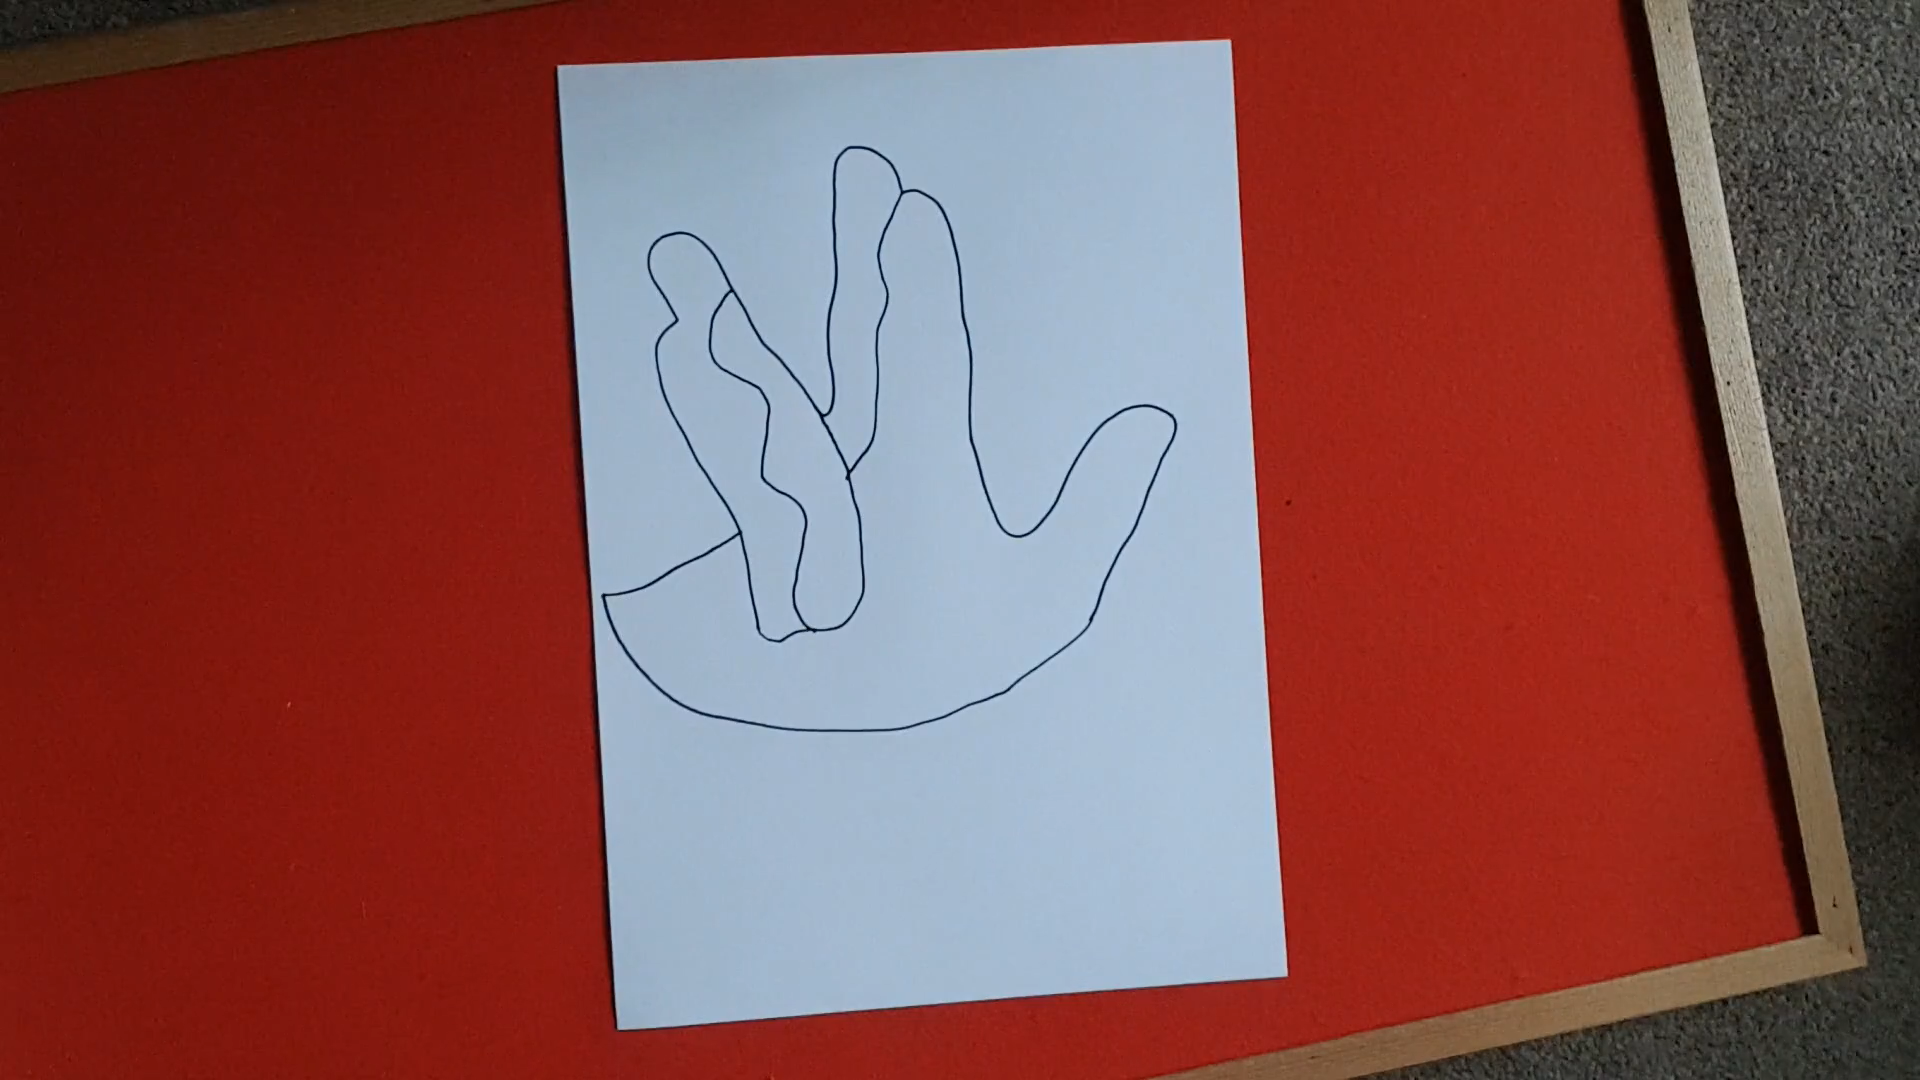
 
Draw two small double curved lines which resemble the letter 'S' close together on where the thumb has been drawn for the bird's necklace. Add a small circle towards the tip of your thumb for the eye as well.

 In the circle for your eye, draw a small circle at the top of it and colour it in with a black pen
 
Add a triangle next to the eye for the beak and a small line heading down for the tail of your bird.

 For the bird's feet, draw two lines with then another three more lines coming off each of the feet you have drawn similar to the image below

 Colour the beak, necklace and tail with a yellow pen

 Colour two parts of your finger drawing with a purple pen similar to the image below
 
You have drawn your own bird palm art

 Watch the Bird Palm Art video:

Thank you and hope you enjoyed the blog post. Please leave in the comments how you found drawing your own bird as well as any feedback you may have. Please also leave in the comments any animals you'd like me to draw for you guys and be sure to check out some of my other blog posts on Danny's Blog.😊🐦

Friday, 12 March 2021

Paper Airplane Challenge

 Age Range: 6-11    

Equipment needed: A4 Paper

 
Paper Airplane Challenge

On this post, I'm going to show you step by step, how to make your own paper airplane. This is a fun activity to do as it can tap into your child’s creative and experimental sides. After you've made your paper airplane, you can decorate it however way you would like to and the best part is..... they really do fly.


To make your paper airplane:


 You will need an 8 and a half inch by 11 inches sheet paper


Fold it in half

  
Fold down the corners as shown

  
Take one side and fold in
  
Do the same for the opposite side
 
 Fold your paper airplane in half

 
Then fold down each of the wings
 
And there you have your own paper airplane
 

Once you’ve made your own paper airplanes, test it to see how far it can go


Thank you and hope you enjoyed the blog post. Please leave in the comments how you found making your own paper airplanes as well as any feedback you may have and be sure to check out some of my other blog posts on Danny's Blog. 😀

Friday, 5 March 2021

Flamingo Palm Art

  Age Range: 4-11

Equipment needed: A4 sheet paper, black, pink and orange felt tip pen
 
Flamingo Palm Art

Have you ever wanted to learn how to draw a flamingo? Well you can do this, simply by using the palm of your hand. ✋🦩

 
To draw your flamingo:
 
With your paper on landscape view, place your left hand on the paper with your fingers in your hand and only your knuckles and thumb of your hand sticking out.
 
Draw round your hand
 
Curve off the bottom of your thumb to the start of where your knuckles were similar to the image below
 
Draw round to link the bottom of your thumb to the rest of your hand
 
 For one foot, start at the bottom and draw two lines from opposite sides both heading upwards towards the body of the flamingo
 
For the next foot, do similar to the previous foot, however add some curve lines similar to the image below
 
In both of your feet, draw some small lines to the side of each of them
 
On the body of your flamingo, draw a cloud shape similar to the image below
 
Draw a small line at the top for the eyebrow. Next, for the eye, start by drawing a circle to the side of where your thumb was drawn

Draw another circle drawn inside the original circle you have just drawn. Colour the inner circle of your eye with a black pen 
(Ensure there is a small white circle left in your eye)
 
For the beak, draw a small triangle just next to your eye
 
Colour the beak of the flamingo with an orange pen
 
Colour the feet and head of the flamingo with a pink pen
 
Colour the cloud shape on the body of your flamingo with a black pen
 
You have drawn your own flamingo palm art


Watch the Flamingo Palm Art video:
 
 
Thank you and hope you enjoyed the blog post. Please leave in the comments how you found drawing your own flamingo as well as any feedback you may have. Please also leave in the comments any animals you'd like me to draw for you guys and be sure to check out some of my other blog posts on Danny's Blog.😊🦩