Friday 30 April 2021

Mouse Palm Art

 Age Range: 4-11

Equipment needed: A4 sheet paper, black, grey and red felt tip pen

Mouse Palm Art
 
Have you ever wanted to learn how to draw a mouse? Well you can do this, simply by using the palm of your hand. ✋🐭

To draw your mouse:
 
 With your left hand, place your hand with your fingers and thumb held together on to your sheet of paper similar to the image below
 
Draw round your hand
 
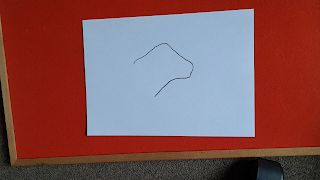
Draw round to connect your hand drawing similar to the image below
 
For the eye, draw a circle to the right of your hand drawing with a small crescent shape in the bottom of your previous circle drawing
 
In the eye, you have currently drawn, draw a small circle on top of the crescent shape and a bigger circle close to the top of the circle
 
Colour your eye in with a black pen ensuring you do not colour in the circles you have drawn inside your eye

 Add three sets of lines three different times. One to the left of your eye and then one set on top of your eye and finally another set to the bottom of your eye.

 Draw a nose for your mouse by drawing a circle to the right of your drawing and colour it in with a black pen. Add then another three lines close to the top of your nose

 Draw two ovals on the top of your hand drawing for the ears. On the left of your oval ear drawing, draw another small circle inside of it and a small T-shape in the circle similar to the image below

 For the mouse's feet, you will need to draw 4 little feet similar to the image below. To do this, draw two fork shaped lines close to each other and then another two fork shaped lines away from the ones you have just drawn.

 Draw a tail from the left hand side of your mouse heading downwards similar to the image below

 Colour the body and both ears (except the middle of the left ear) with a grey felt tip pen

 Colour the middle of the left ear with a red felt tip pen

 You have made your own mouse palm art


Watch the Mouse Palm Art video:
 

Thank you and hope you enjoyed the blog post. Please leave in the comments how you found drawing your own mouse as well as any feedback you may have. Please also leave in the comments any animals you'd like me to draw for you guys and be sure to check out some of my other blog posts on Danny's Blog.😊🐭

Friday 23 April 2021

Ice on a String Experiment

 Age Range: 4-11
 
Equipment needed: Ice cube, salt, string, glass, water and scissors
 
Adult supervision required

Ice on a String Experiment

On this post, I will be showing a science experiment and a magic trick at the same time which is sure to impress your friends and family. You can see how to pick up ice with a single piece of string. This science experiment does require adult supervision and can help you think and learn about melting and freezing.

 For this experiment, you'll need the following items from the image below:


To do this experiment:

 Fill the glass to the top with water

Cut a piece of string around 20cm long

Place an ice cube in the water and it will float

Lay the string across the ice cube and glass

 Cover the ice cube and string with a layer of salt

Leave it to sit for 1 minute

 Carefully pick up both ends of the string

And there you go, you have picked up ice with a piece of string. Challenge your friends and family to see if they can do this experiment.

The science behind this:    

Salt lowers the freezing point of water to below 0 degrees. When you add salt to the ice cube, the salt lowers the melting point of the ice. The salt is in a thin layer, so it means a thin layer on top of the ice cube. The water cooled down further and re-froze around the string. This allowed the string to pick up the ice cube.

This is also why we use salt in winter to prevent roads from getting icy. The salt lowers the melting point of ice and stops roads from becoming icy and dangerous.

Watch the video to see how to do the ice on a string experiment:

 
Thanks guys and hope you enjoyed the post today. Be sure to leave a comment on how you found doing the ice on a string experiment and be sure to check out some of my other blog posts.😀

Friday 16 April 2021

Chick Palm Art

  Age Range: 4-11

Equipment needed: A4 sheet paper, black, yellow and red felt tip pen
 
Chick Palm Art
 
 
Have you ever wanted to learn how to draw a chick? Well you can do this, simply by using the palm of your hand. ✋🐤
 
To draw your chick:
 
With your left hand, place your fingers on your thumb on your sheet of paper similar to the image below
 
Draw around your hand
 
Turn your sheet of paper round so that your hand drawing faces downwards
 
Add a curve round the top similar to the image below
 
On the top right hand side of your drawing, draw a M-shaped beak

 Colour the beak in with a black pen
 
Draw a circle for the eye and a small crescent shape in the eye similar to the image below

 Draw a small circle close to the top of your outer circle
 
Colour the circle of your eye in with a black pen ensuring you do not colour in the small circle you have drawn
 
Draw three small lines on the outside of your eye for the lashes
 
Add the feet by drawing two stick lines with three small lines coming off them similar to the image below

Draw a small red circle under your chick's eye

Colour the body of your chick in with a yellow pen

OPTIONAL: Add the words 'peep peep' just next to your chick's beak with a red pen

 You have drawn your own chick palm art

 
Watch the Chick Palm Art video:
 

Thank you and hope you enjoyed the blog post. Please leave in the comments how you found drawing your own chick as well as any feedback you may have. Please also leave in the comments any animals you'd like me to draw for you guys and be sure to check out some of my other blog posts on Danny's Blog.😊🐤

Friday 9 April 2021

Sock Toss

 Age Range: 5-11

Equipment needed: Pairs of socks and a basket

Sock Toss
 
Have you ever found you have lots of socks lying around in your room and need to put them away? 
Well you can with this sock toss game which makes putting your socks away more fun
 All you need are a basket and then a collection of balled up socks and then you can practice your aim and hand/eye coordination by tossing the socks into your basket

To play sock toss:
 
Start by placing your basket on the floor in a good area where you can throw socks into. Bundle up your socks together as well into a ball.

 Take a couple of steps back from your basket and get ready to throw your ball of socks

Once your ready, try to throw your socks so that it lands into the basket
 
Use your remaining socks to land them into the basket

 
To progress this game:
 
You could use your left hand

Use a blindfold

Throw with the basket behind you

Feel free to play this game however you would like to and come up with your own progressions if you want to when playing this game

Thanks guys and hope you enjoyed the post today. Be sure to leave a comment on how you found playing this game and any other ways you have progressed this game and be sure to also check out our some of my other blogs I have posted. 😊